Getting your room dimensions accurate is the most critical step in any flooring project, yet it is often the one homeowners rush through. Whether you are upgrading a small box room or renovating an open-plan living area, accuracy at this stage eliminates issues further down the line. A slight miscalculation can lead to a frustrating shortfall in materials, halting your project, or an overspend that eats into your renovation budget.
In 2026, with the cost of materials and living on everyone’s mind, precision is key. This guide will walk you through exactly how to measure your space like a professional, ensuring you order the perfect amount of Pro-Tek™ flooring every time.
Jump To Section
- Why Accurate Room Dimensions Are Crucial
- Tools You Need for Measuring Room Dimensions
- Calculating Room Dimensions in Standard Spaces
- Handling Irregular Room Dimensions and Obstacles
- Why Doorways Affect Your Overall Room Dimensions
- Adjusting Room Dimensions for Wastage and Expansion
- Final Thoughts on Mastering Your Room Dimensions
Why Accurate Room Dimensions Are Crucial
Relying on an “eyeball measurement” or a rough estimation is a recipe for disaster. Floors need to be measured to the millimetre. If you fail to record precise room dimensions, you risk significant delays. Imagine having your installer booked, only to realise you are two boxes short because you guessed the length of the hallway.
Furthermore, no two rooms are perfectly square. Walls often run out of true, and older properties are notorious for quirky angles. Taking the time to double or even triple-check your measurements ensures that you catch these nuances before you place your order.
Tools You Need for Measuring Room Dimensions
Before you start, you need the right kit. While a standard tape measure is the classic choice, modern laser distance measurers can offer incredible accuracy for longer spans.
- Steel Tape Measure: Essential for short distances and checking alcoves.
- Laser Measure: Great for getting a quick reading of overall room dimensions in large spaces.
- Notebook and Graph Paper: Sketching the room shape helps you visualise the area and ensures you don’t miss any nooks.
- Calculator: To convert your length and width into total square metrage.
Calculating Room Dimensions in Standard Spaces
For a simple square or rectangular room, the process is straightforward. Measure the length and the width of the room at their widest points. Multiply these two numbers together to get your total area in square metres.
However, a common pitfall is not measuring multiple points. We recommend measuring the width at both ends and the middle of the room. If there is a discrepancy, always use the largest of your room dimensions. It is far easier to trim a Pro-Tek™ plank down than to stretch one to fill a gap!
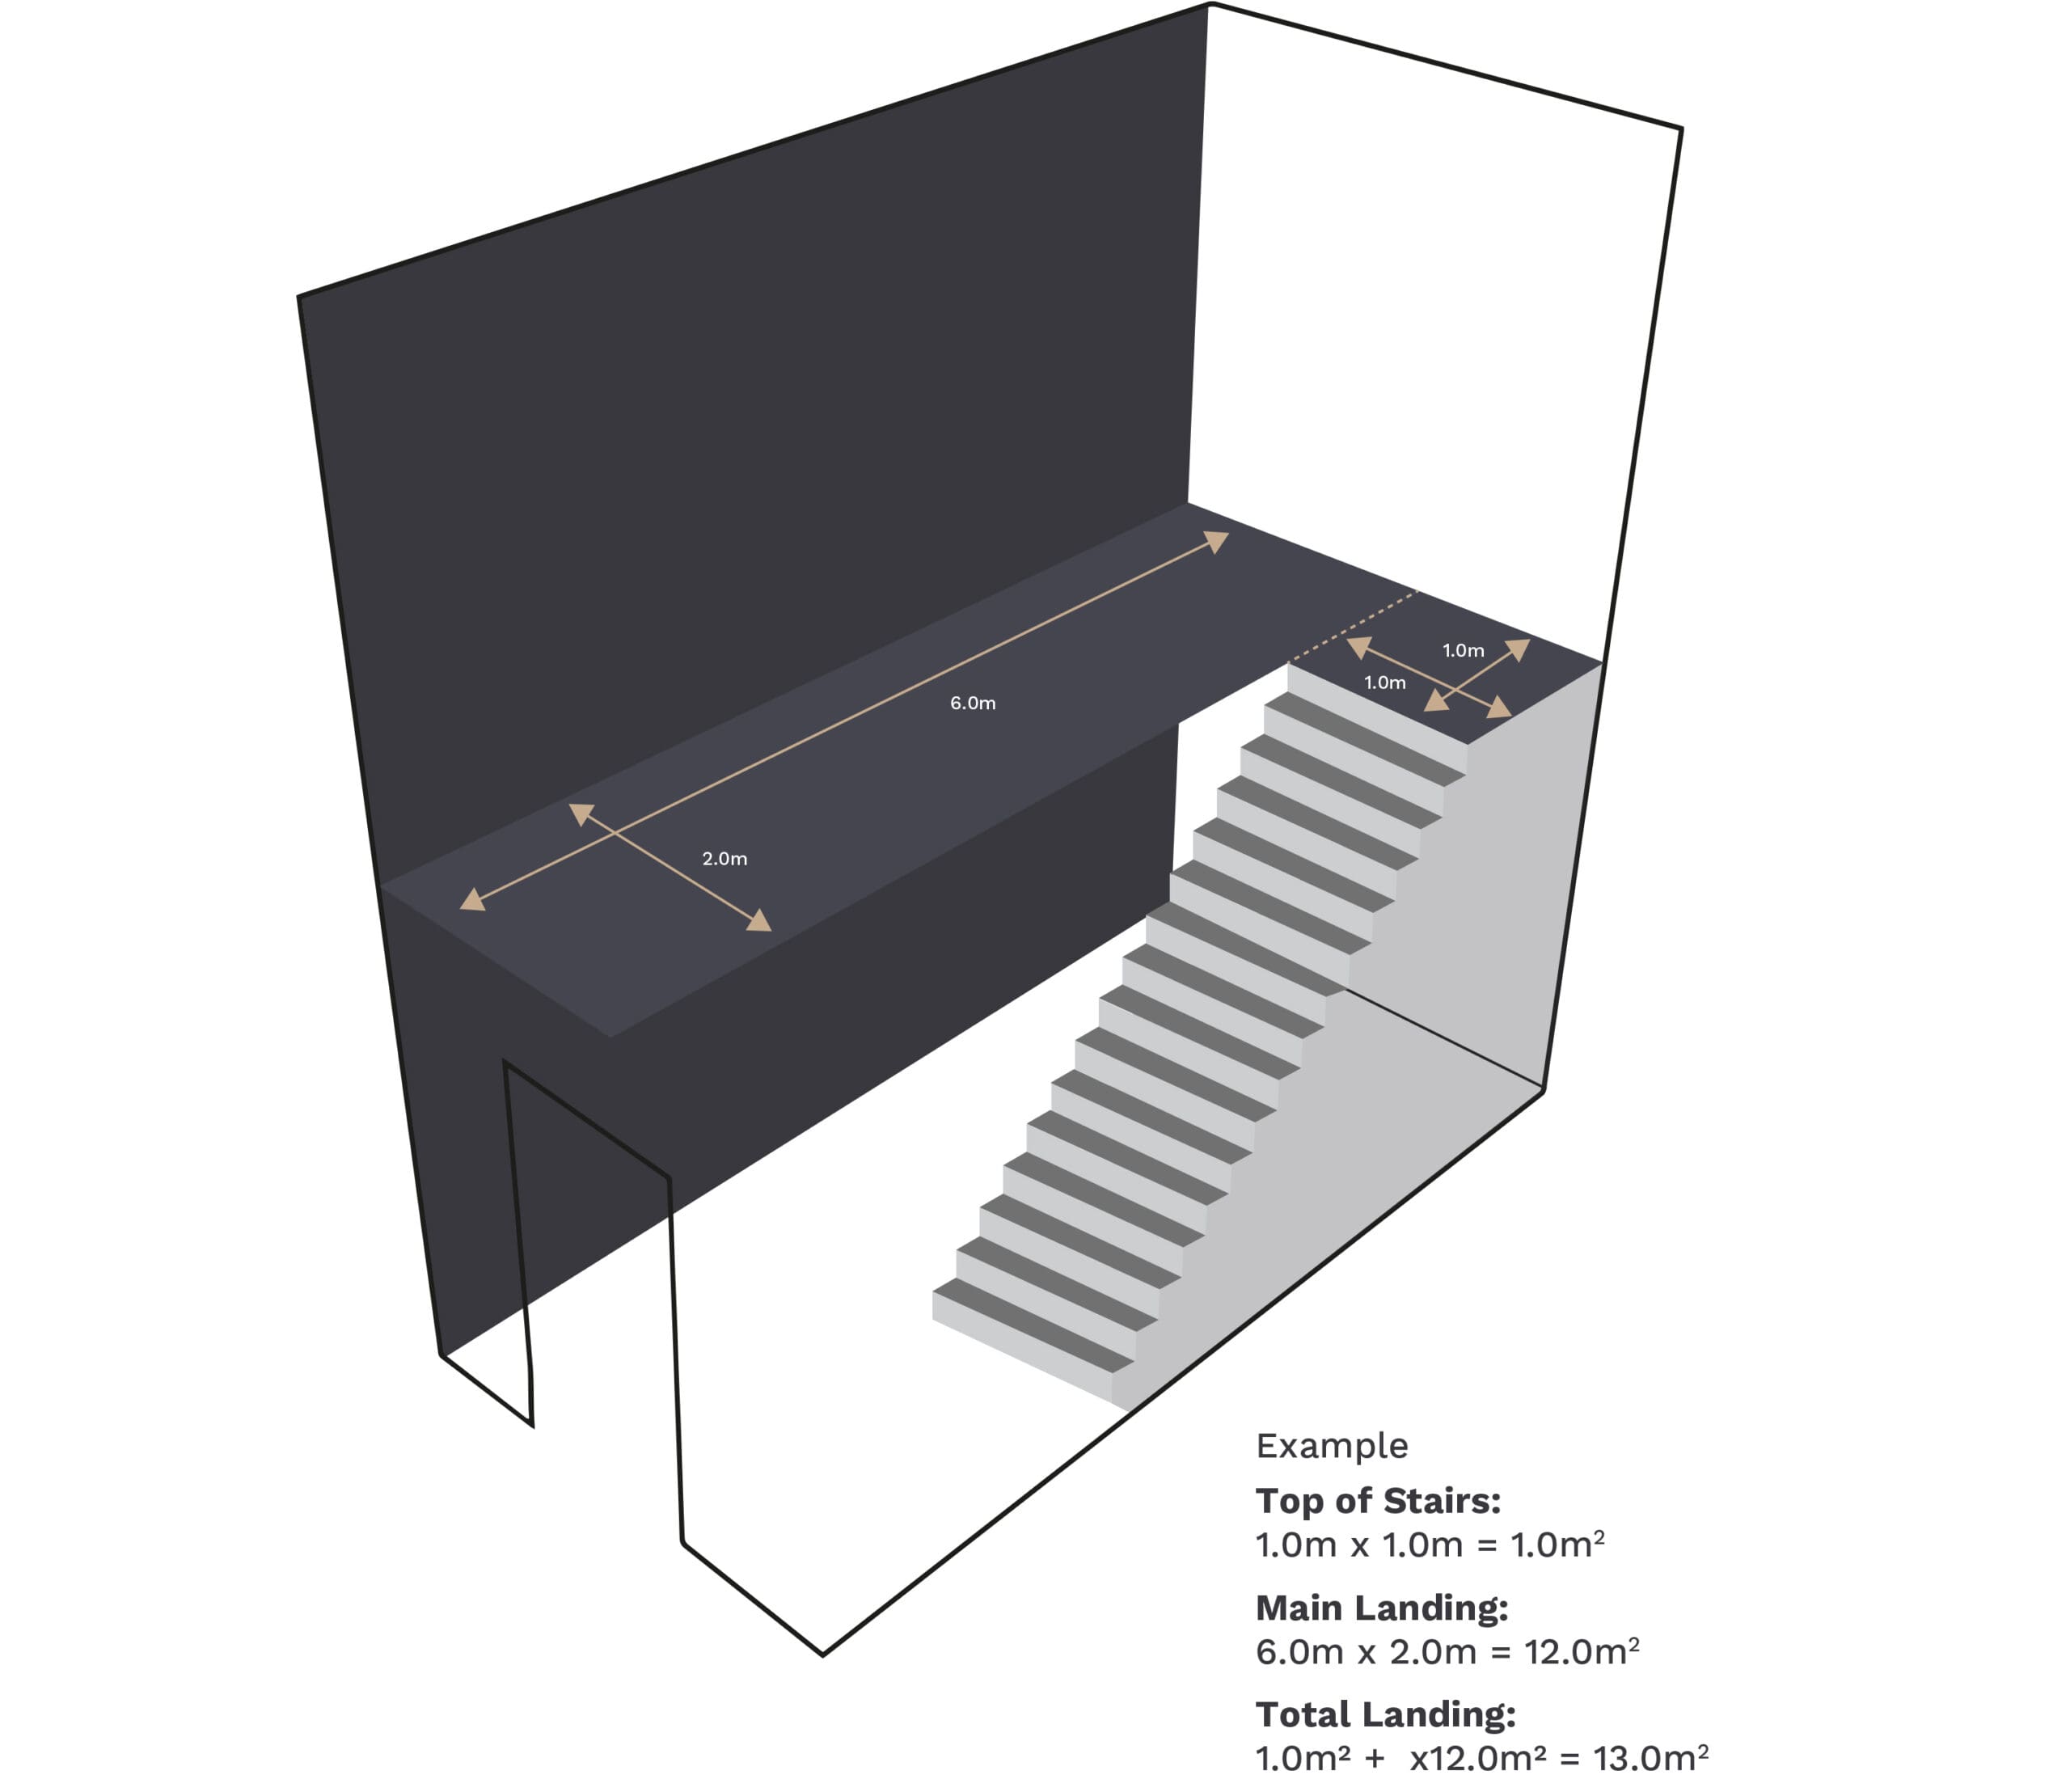
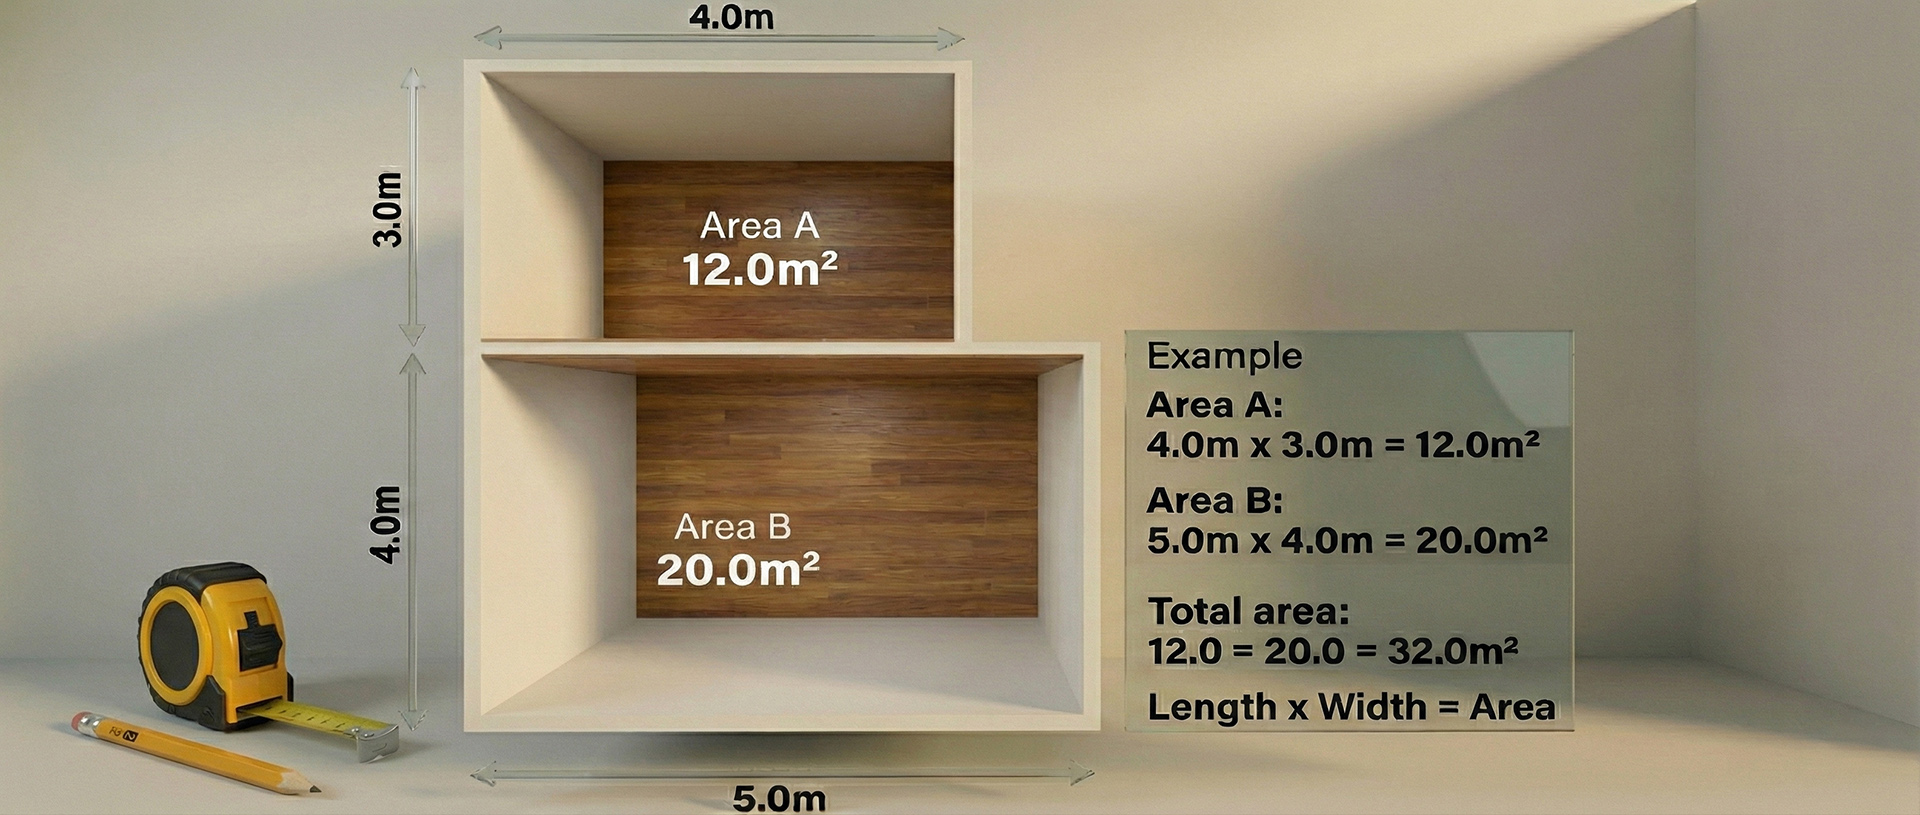
Handling Irregular Room Dimensions and Obstacles
Most rooms are not perfect rectangles. They come with fireplaces, bay windows, kitchen islands, and structural columns. Failure to account for these irregular shapes will likely mean you underestimate the amount of flooring needed.
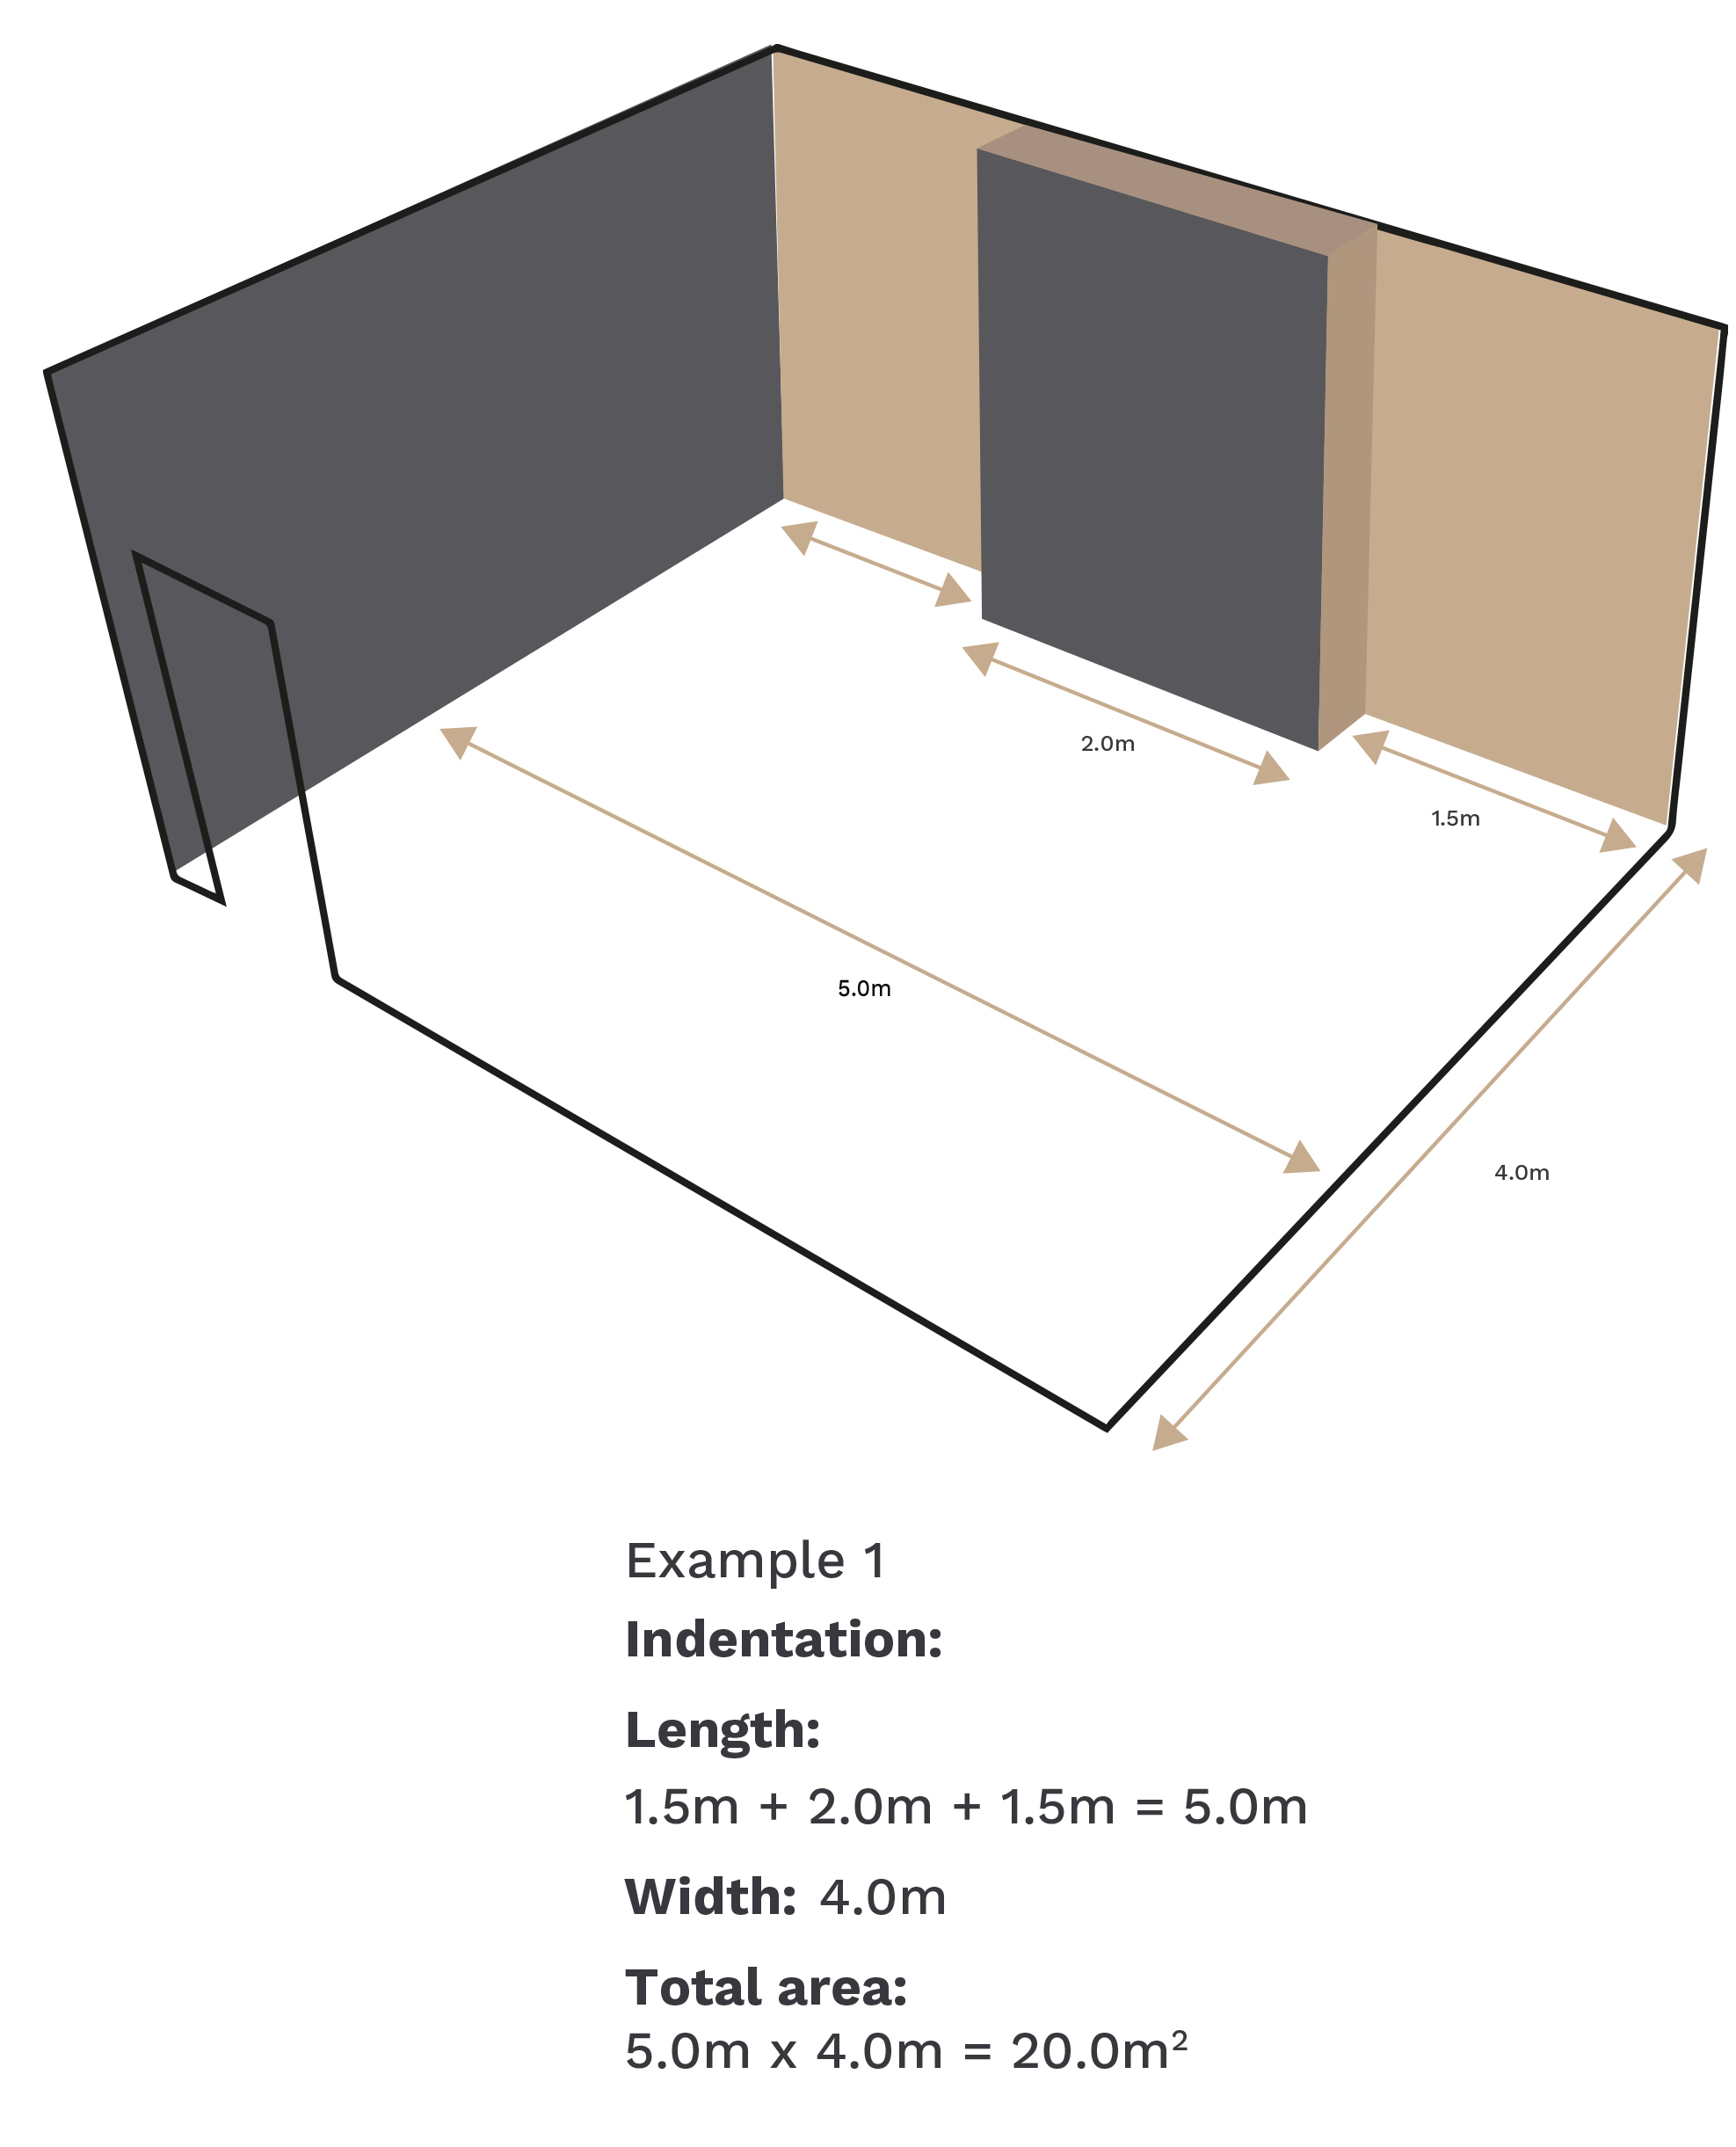
To tackle this, break your floor plan down into smaller, manageable rectangles. Measure each section individually—for example, the main floor area as one block and the fireplace alcoves as separate blocks. Calculate the area for each and add them together to get your total room dimensions.
Why Doorways Affect Your Overall Room Dimensions
It is easy to miss the small characteristics of a room that actually consume flooring. One of the most common mistakes is forgetting to measure into the doorway.
When you install new flooring, it typically needs to finish halfway under the door shut so the join is hidden when the door is closed. If you simply measure wall-to-wall, you might miss these crucial few inches. Always measure from the back of the door frame to the opposite wall to ensure your room dimensions cover every inch of visible floor.
Adjusting Room Dimensions for Wastage and Expansion
Once you have your total area, you are not quite done. You must account for “wastage.” This refers to the offcuts created when you cut planks to fit around obstacles or at the end of rows.
- Standard Straight Fit: We recommend adding at least 10% extra to your total room dimensions.
- Patterned Fit (e.g., Herringbone): Due to the complexity of the cuts and the pattern continuity, you should allow for 15-20% wastage.
Pro-Tek™ luxury vinyl is easy to cut, and because it features a built-in underlay, you save time and effort. However, having that extra buffer is essential. Additionally, remember to leave an expansion gap around the perimeter (usually hidden by skirting boards) to allow the floating floor to expand and contract naturally with temperature changes.
Final Thoughts on Mastering Your Room Dimensions
There are many resources available to help you, but the golden rule remains: measure twice, cut once. Accuracy in your room dimensions is essential to avoid extra costs and stress.
As a rule of thumb, it is always better to have too much material than not enough. Leftover boxes can be kept for future repairs if accidental damage occurs. If you are ever unsure about your calculations, don’t be afraid to ask a flooring expert for advice before hitting the “buy” button.